Nothing beats the cleansing wash of a bidet. Once you’re used to that shower-fresh feeling, there’s just no going without one.
That’s great for those who already have a bidet. But if you haven’t gotten one yet, you probably have a few questions—especially about the installation process.
Handheld bidet sprayers are easy to install, and shouldn’t take more than 30 minutes to do so—whether you consider yourself a handy person or not. They tend to include all of the parts you’ll need for installation. (Though you may need a couple of extra things, like a bucket and an adjustable wrench.)
What is a handheld bidet?
A handheld bidet is a lot like a handheld showerhead or kitchen sprayer—except that it’s specifically designed to wash your nether regions.
Learning how to install a toilet sprayer is easy. So let’s get into it.
Before installing: check your water supply line
That’s the water connection that runs between your toilet tank and the wall. If it’s a rigid pipe, you’ll need to replace it with a flexible water supply line before continuing. These can be found at most hardware shops, both online and in-store.
Step 1. Turn off the water supply
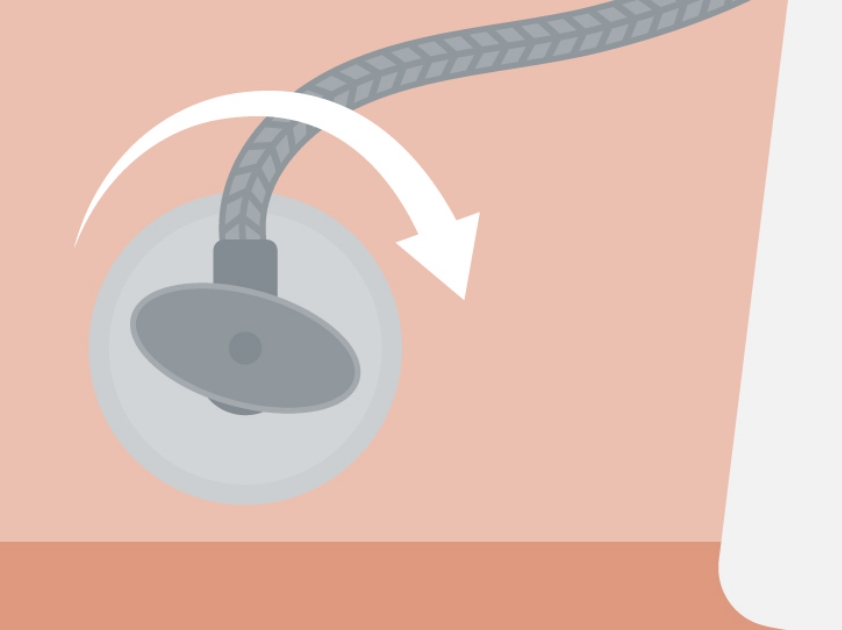
Turn off the water supply valve at the wall next to your toilet. Twist it clockwise as far as it will go. Flush the toilet and hold down the handle to empty the toilet tank.
Note: Have a bucket or towel ready before you begin the next step. The previous step should remove most of the water. However, some leaking my occur if there's any water left over in the toilet tank or plumbing connections.
Step 2. Connect the T-Valve
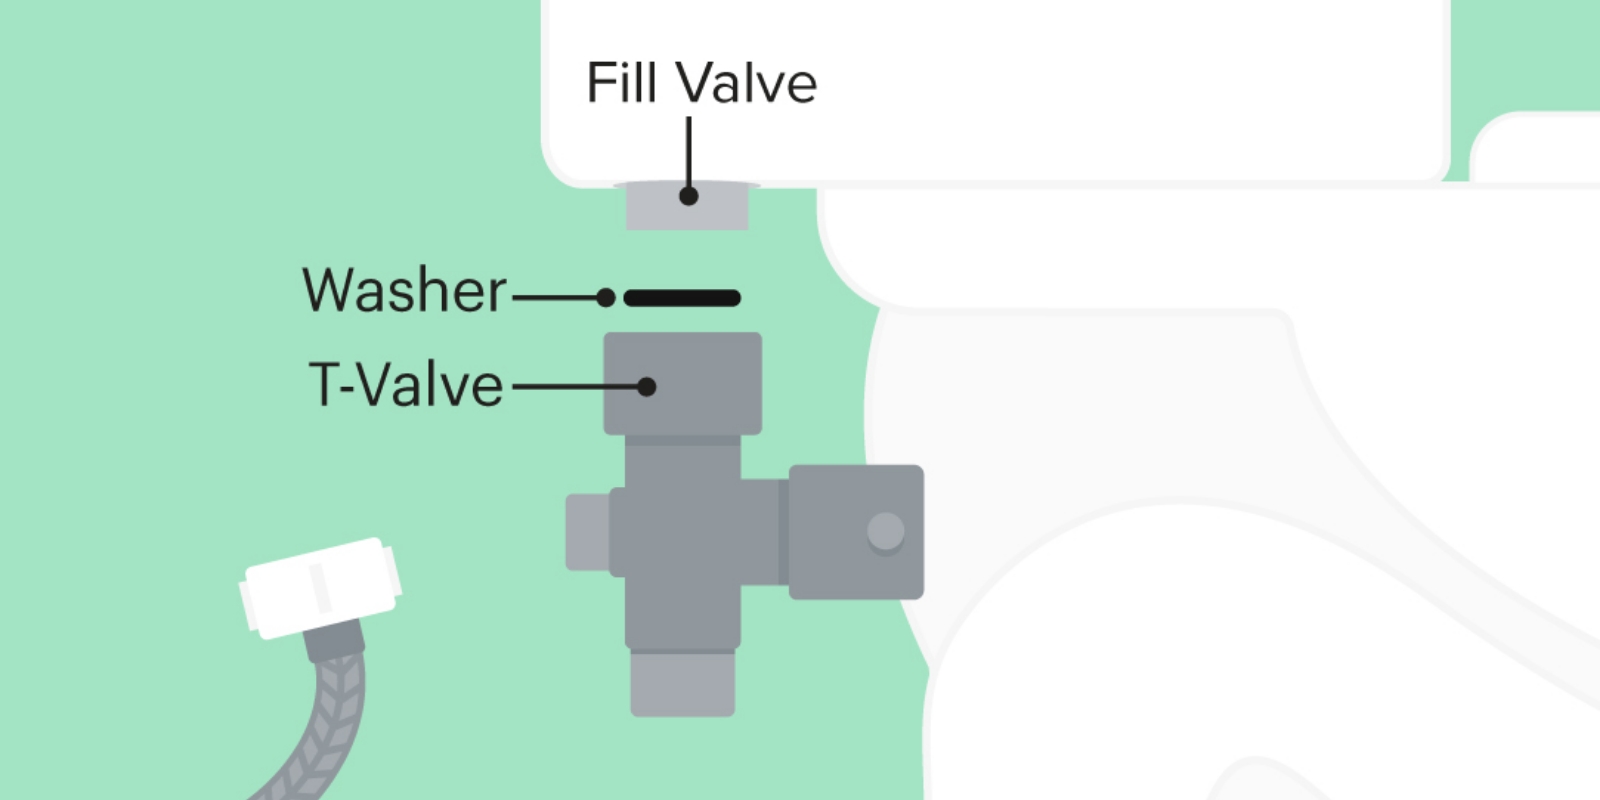
Unscrew the flexible water supply line at the fill valve under your toilet tank—not from the water supply valve at the wall.
Confirm that the flat rubber washer is inside the top of your bidet’s T-Valve. Screw the top of the T-Valve onto the toilet’s fill valve. You can do this manually or with an adjustable wrench. Just be careful not to overtighten the connections.
Step 3. Connect the hoses
Screw the toilet’s water supply line to the bottom of the T-Valve.
Installing the bidet hose comes next. Connect one end of the bidet hose to the side of the T-Valve. Screw the bidet sprayer head onto the other end of the bidet hose.
Step 4. Turn on the water supply and mount the sprayer
Turn the water supply valve back on. If you notice that any connection is loose or leaking, you may need to add some plumber’s tape. If its leak-free, your handheld bidet sprayer is ready to use.
Step 5. Mount the bidet holster
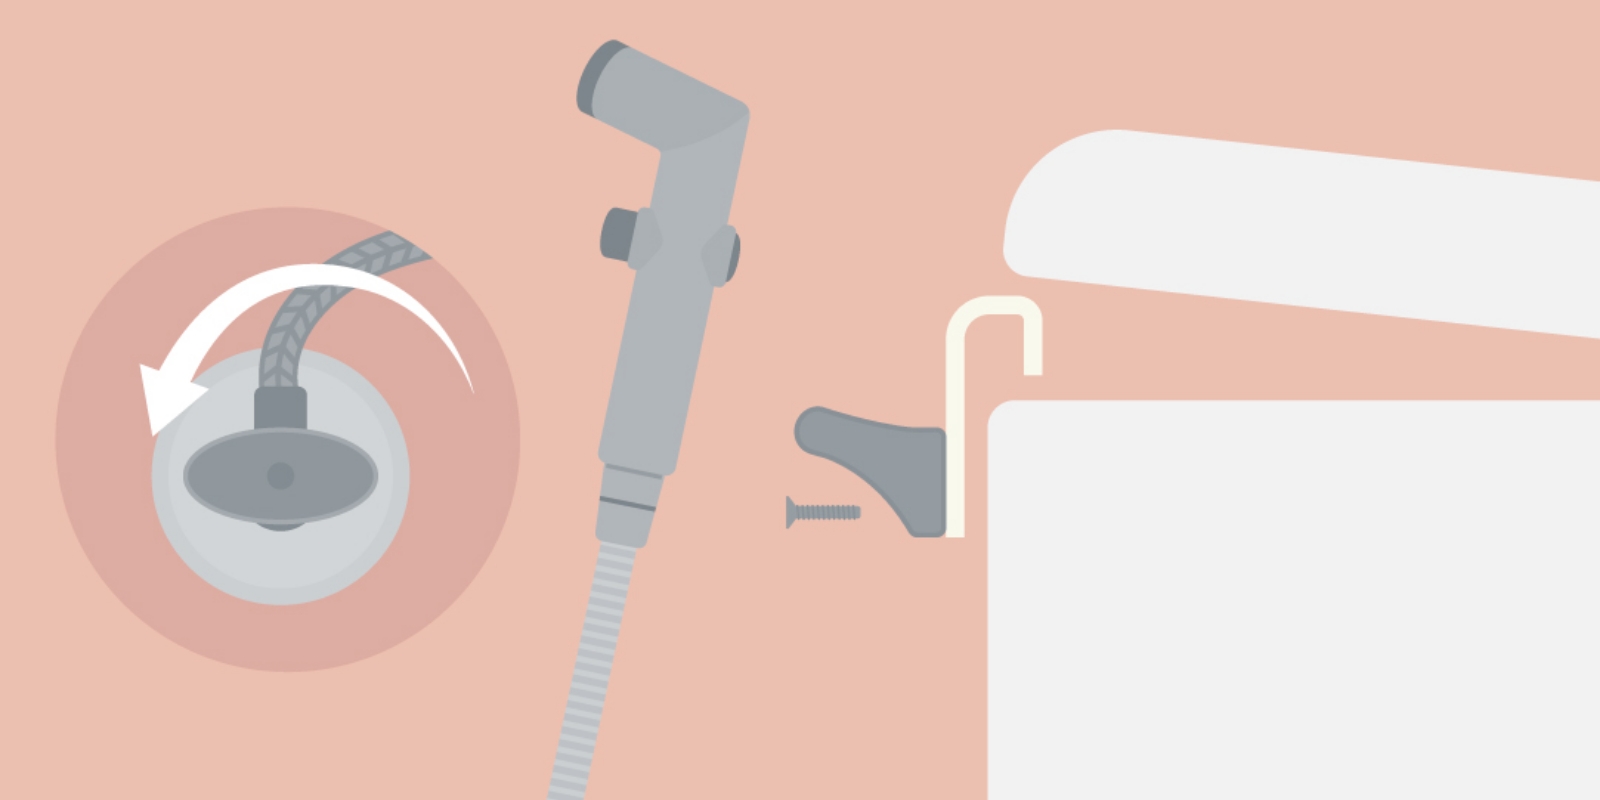
Most handheld bidets include a holster with purchase. This can be mounted on your toilet tank or bathroom wall.
To mount the holster to your toilet tank: Screw the holster onto the toilet tank clip. Lift up the toilet tank lid, slide the clip onto the side of the tank, and replace the lid.
To mount the holster to your wall: Use the drywall screws and anchors.
Remember to turn off the T-Valve after every use
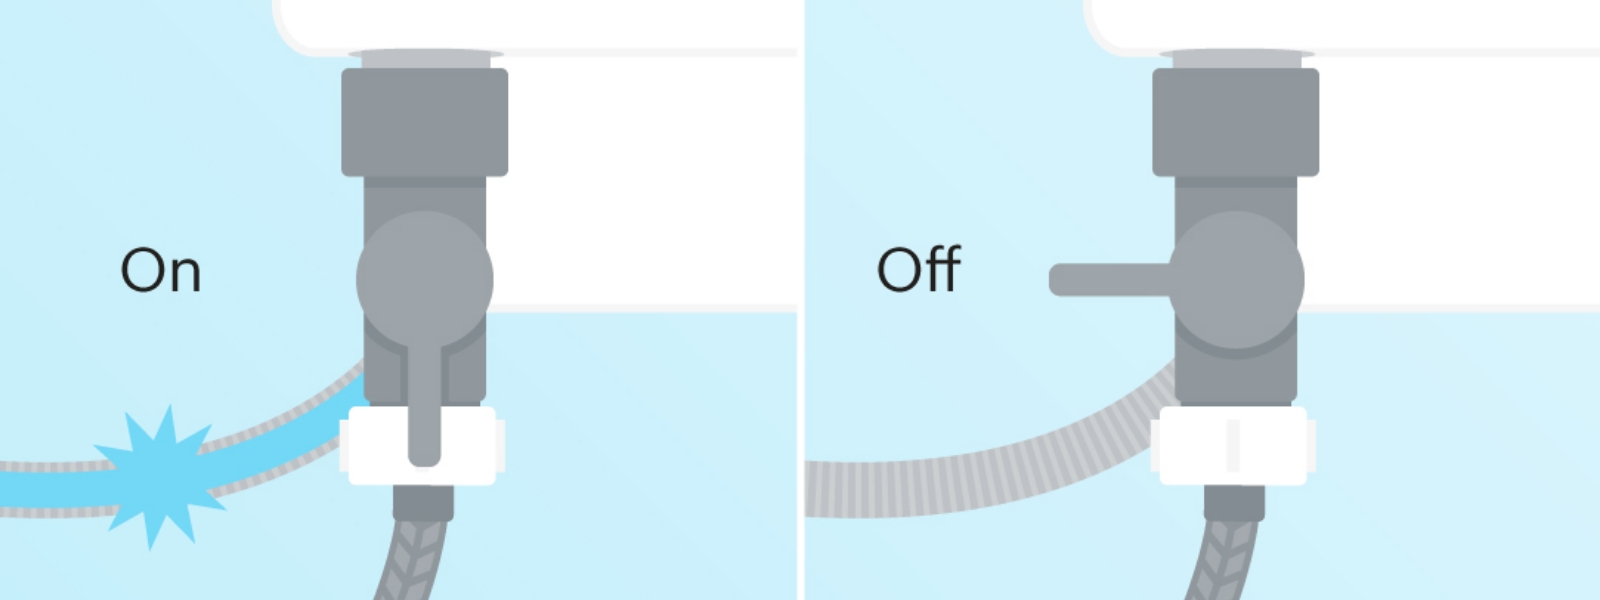
Bidet leaks can happen when a handheld bidet isn’t turned off properly. To prevent leaking, it’s absolutely essential to turn off the T-Valve after using your bidet.
A bidet sprayer works in the same way as a garden hose nozzle. Just because you release the handle doesn’t mean the water is turned off. You still need to turn the spigot off at the other end of the hose. If you don’t, the hose will leak or burst.
The same principle applies to a bidet sprayer.
When you release the sprayer’s handle or trigger, you stop the spray—but there is still water pressure pushing against the bidet hose and sprayer head. Over time, this pressure causes damage, followed by leaking. If the damage is severe enough, it can even flood a bathroom.
Shutting the water off at the T-Valve after each use prevents that from happening.
How do you fix a leaking bidet sprayer?
There are many reasons why you might want to remove your handheld bidet. Maybe you want to upgrade to a bidet toilet seat. Or maybe you are moving and want to bring your bidet with you.
One of the great things about handheld bidets is that they’re not permanent. They’re as easy to remove as they are to set up. To remove your handheld bidet, go back to Step 1, turn off your water supply, and flush. Then just follow the instructions above in reverse.
Looking for more resources?
Check out our help center for installation videos, FAQs, user manuals, and more.
